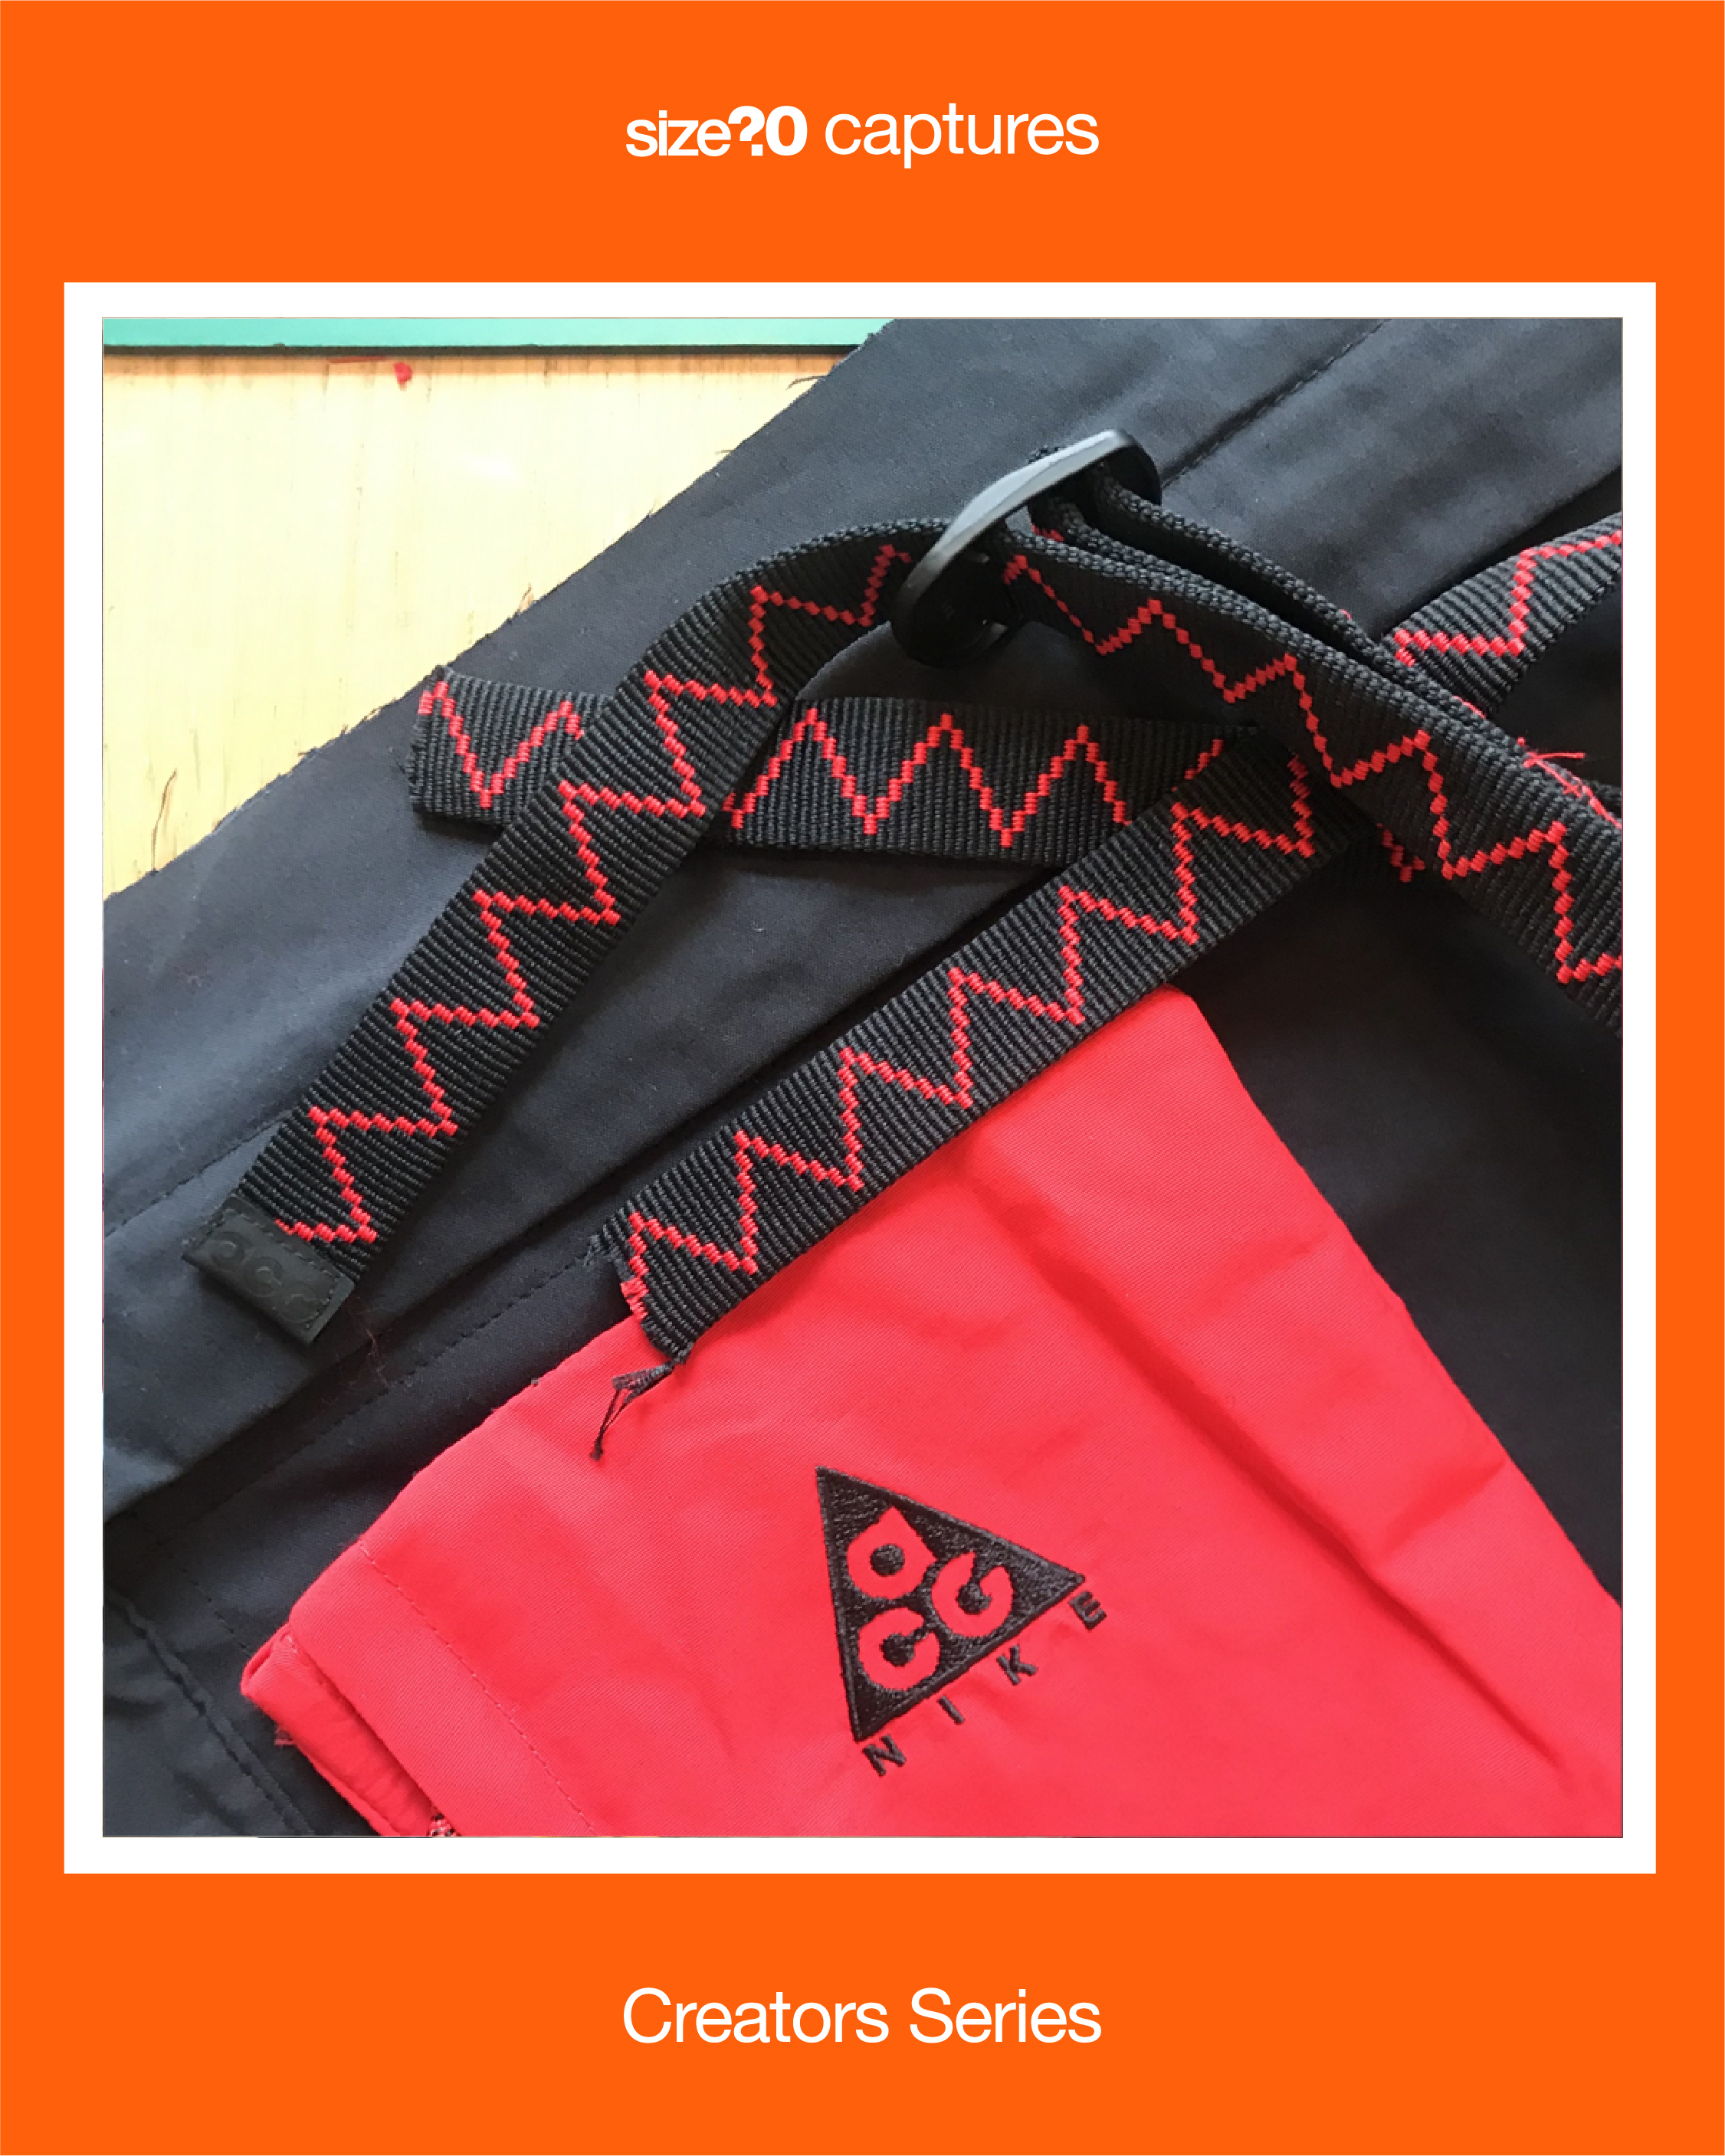
size? captures: Creators Series – How to make bags with Finn Taberer
Share This:
We’ve always championed creativity here at size?; we’re big believers in recycling, upcycling and customising old clothing, and that’s where the size? captures: Creators Series comes in.
We’ve teamed up with a few creatives for a series of handy ‘how-to’ guides that give you step-by-step instructions on how to breathe new life into your old clothing and footwear.
First on the bill, it’s Finn Taberer. Finn tells us that he’s always been interested in taking things apart, fixing them back together, or using the pieces to create something new. His latest focus has been bags.
“Throughout quarantine, I‘ve kept myself busy designing and making bags using anything I can get my hands on, from old trainers to jackets and waste material from uni projects. I’ve always enjoyed customising and up-cycling my old products to create new ones. I feel more people should try up-cycling at home as it’s easier than you’d think.”
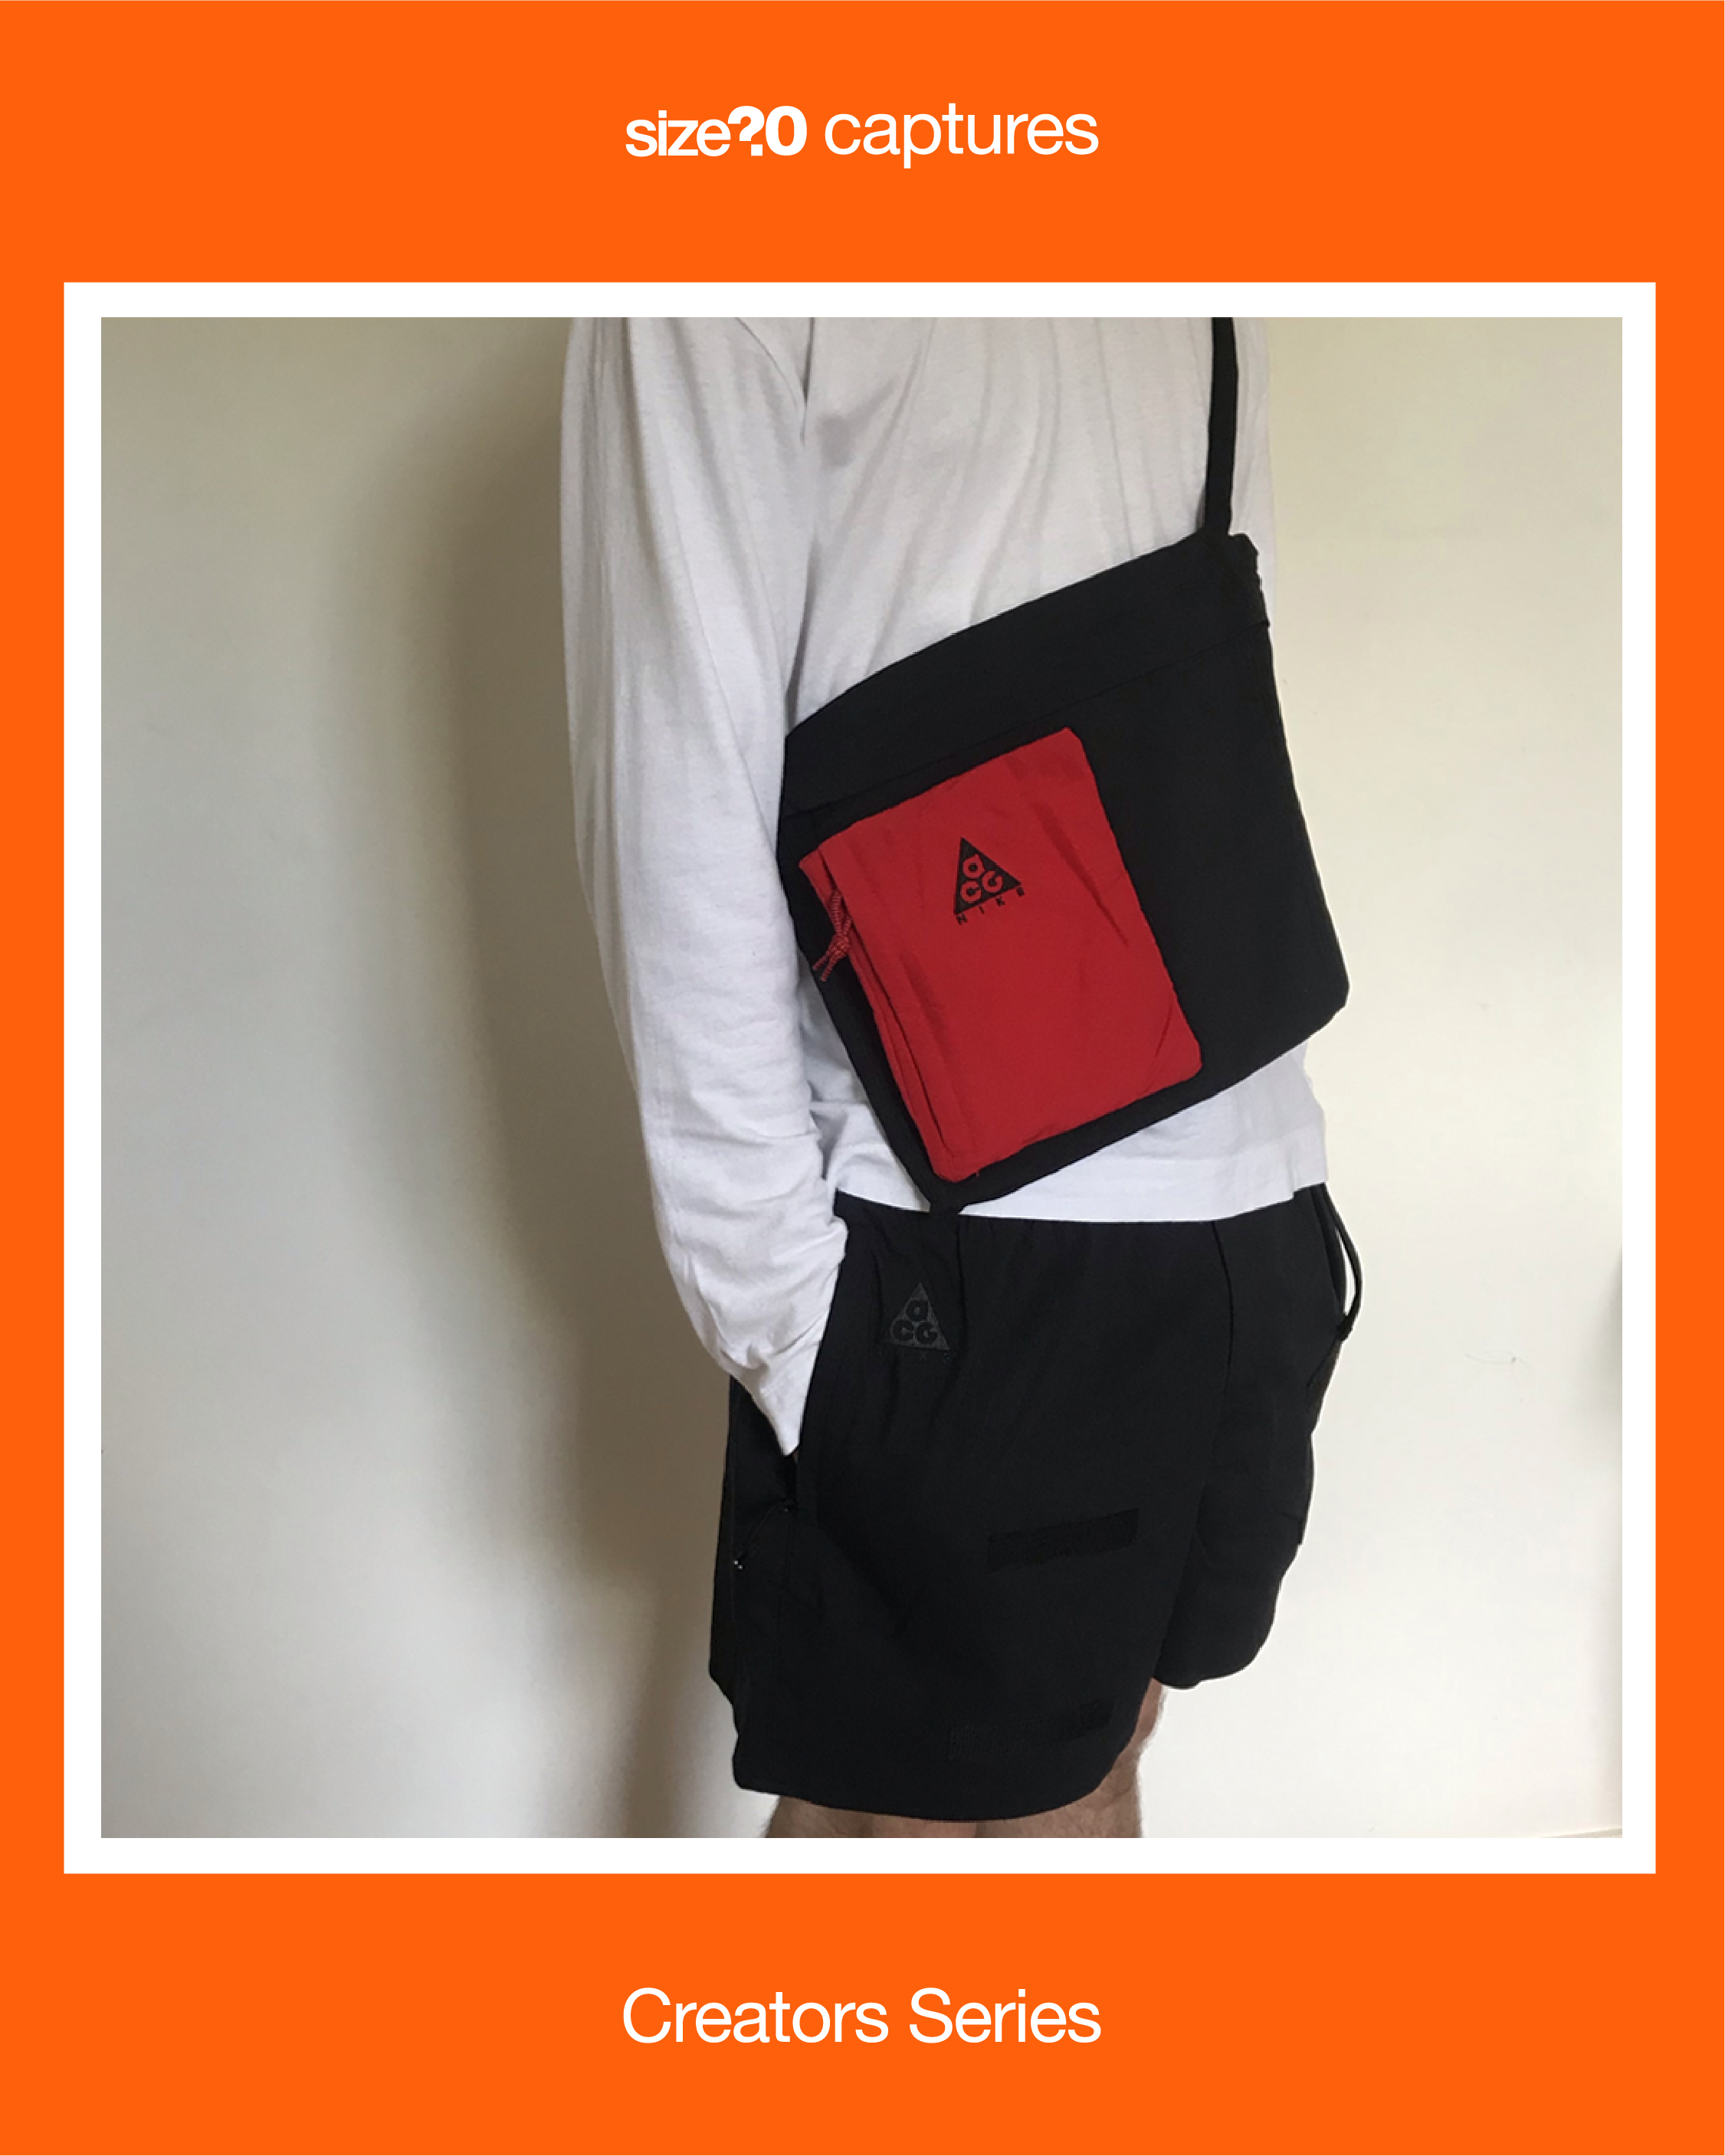
Finn’s been kind enough to shine a light on his process and talk us through how you can turn a pair of red ACG Cargo Shorts and black ACG Cargo Trousers into a neat little side and tote bag.
He explains: “The velcro pockets are the main element of this upcycling project; I wanted to create something unique and customisable.“
Let’s take a look at Finn’s method then, shall we?
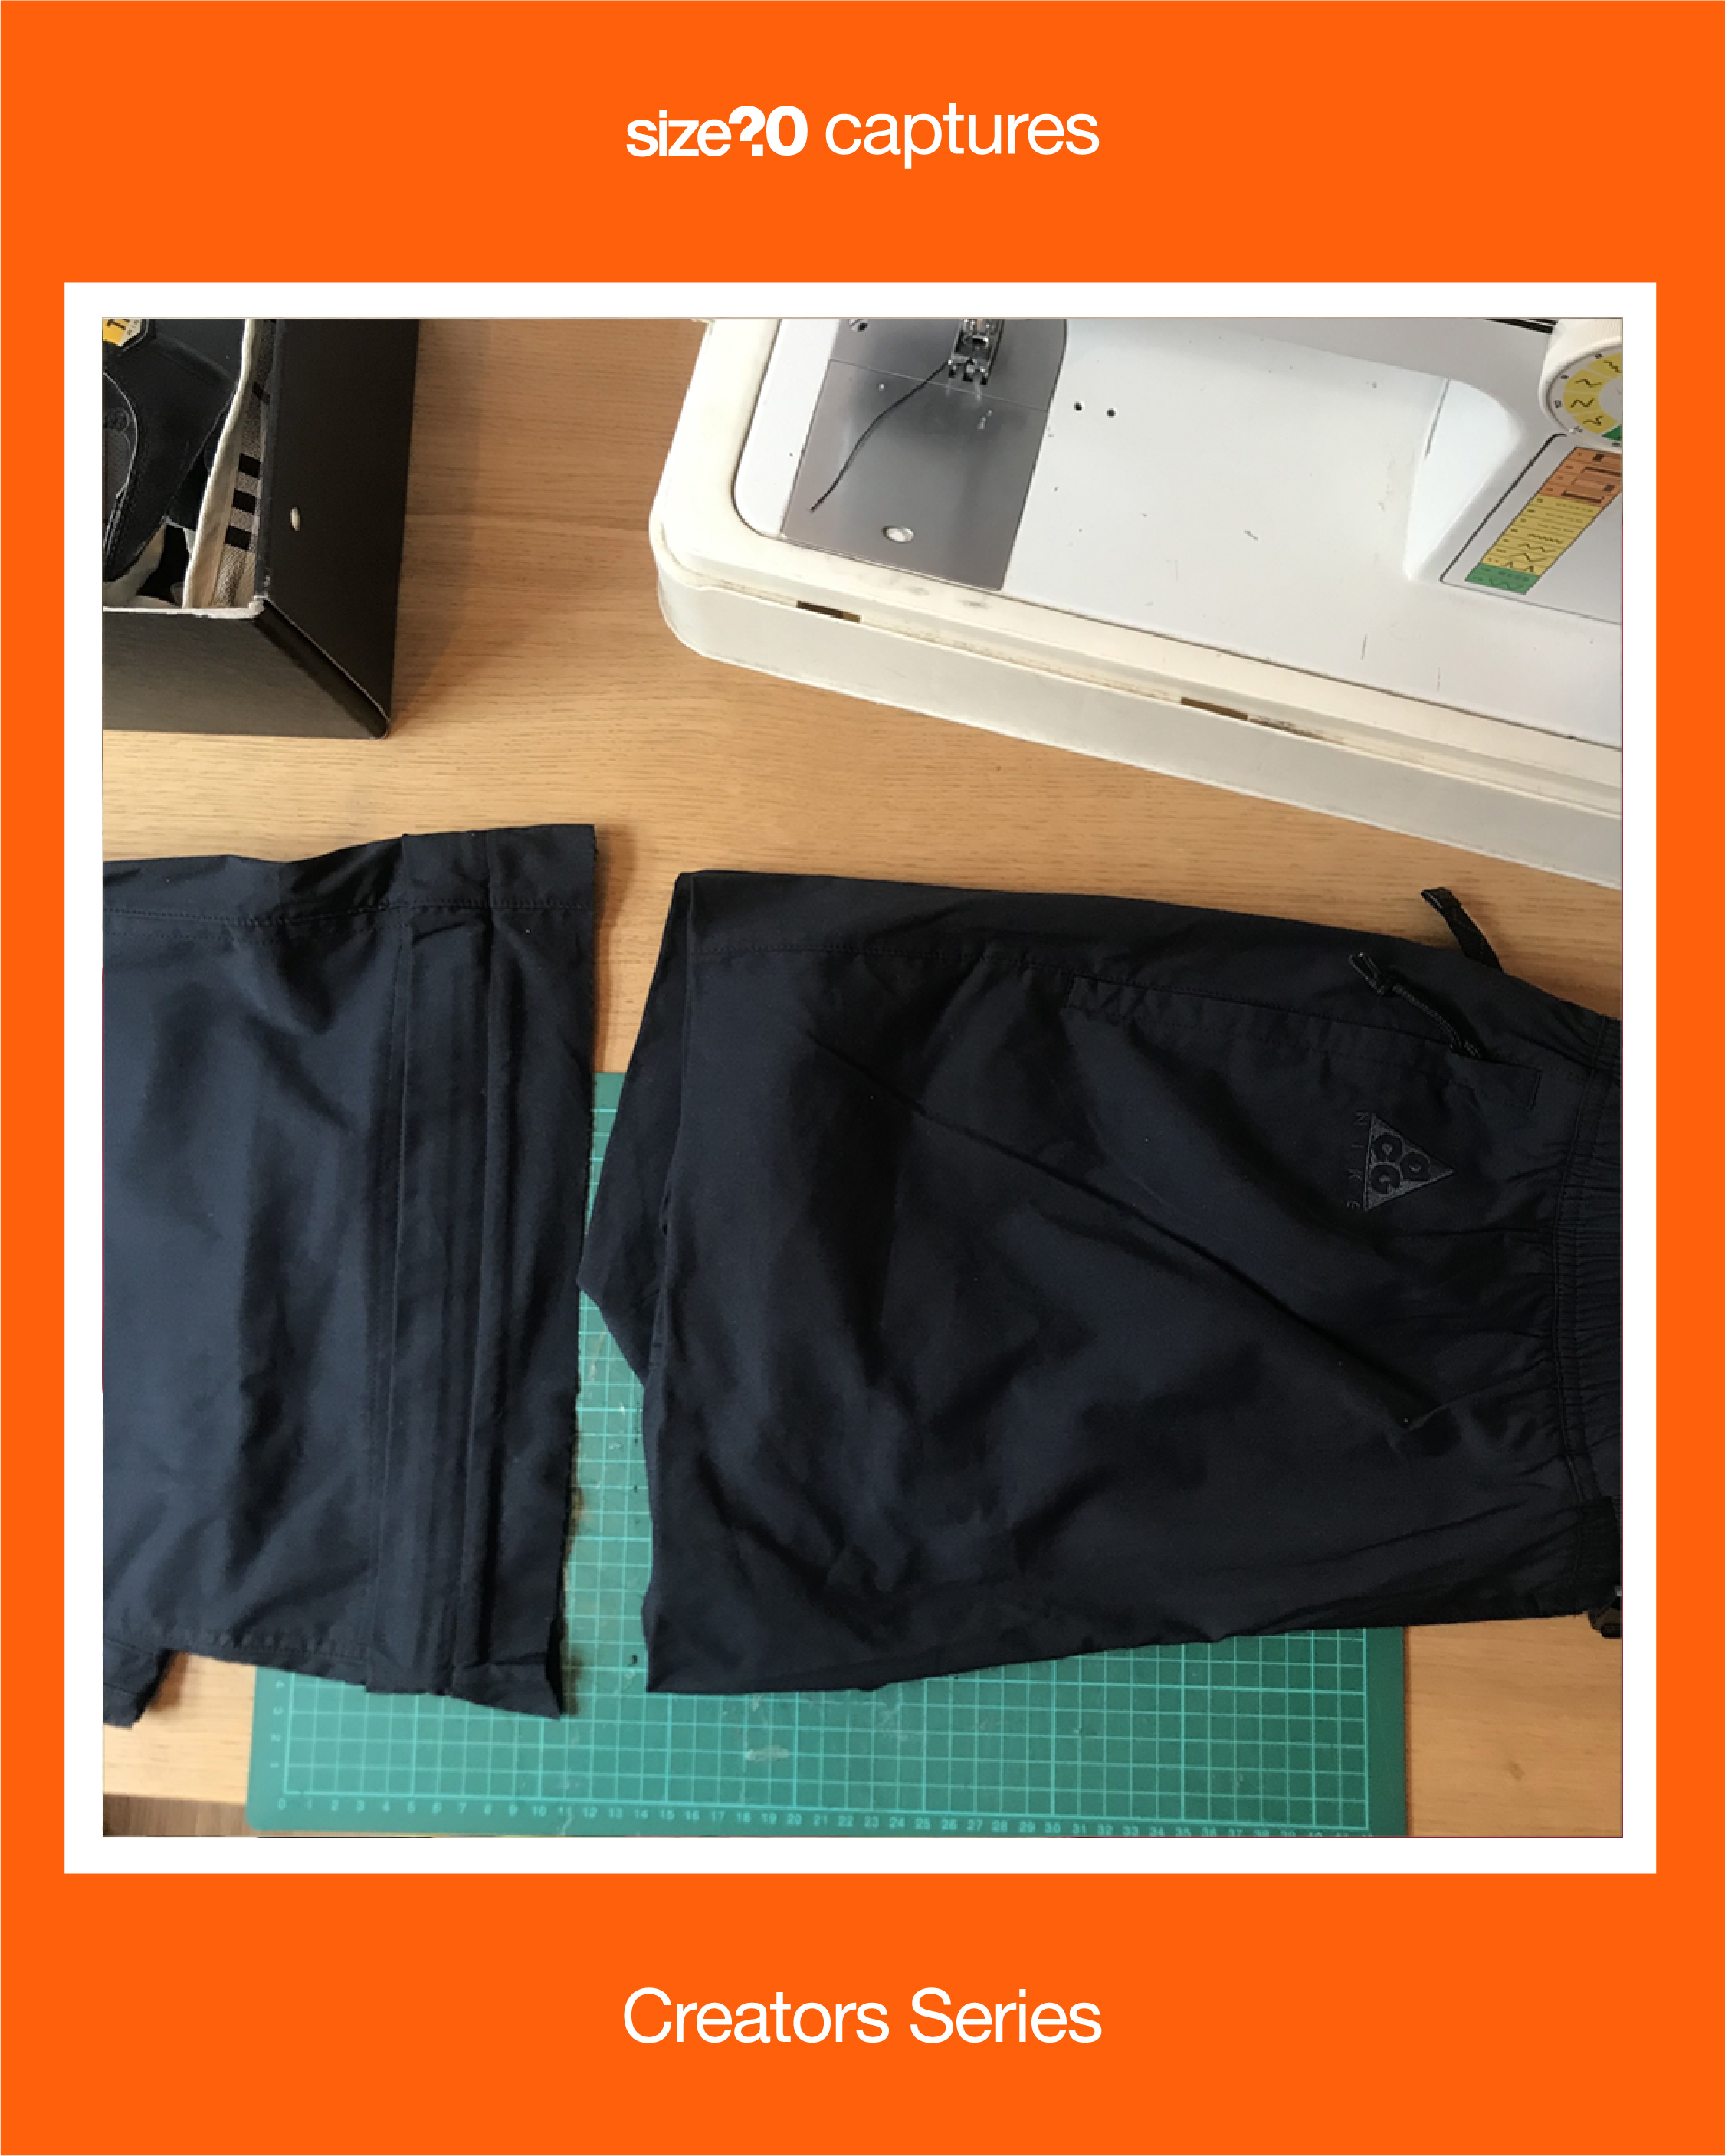
How to make trousers into shorts.
Step 1: Cut one trouser leg to your desired length (plus an extra inch), then fold that pant leg over to the other side and use it to cut the second side. This will make sure your legs are the same length.
Step 2: Fold under each pant leg one inch, pin in place, and then look to see if they look straight and even. Adjust if needed.
Step 3: Stitch around the edge of both legs, removing the pins as you go. You’ve now got a pair of finished shorts.
Step 4: Think about where you want to add your interchangeable pockets and glue one side of your Velcro pieces in place before stitching down – this will make it easier to sew neatly.
Step 5: Secure in place by top stitching around each side, as close to the edge as possible. Note: make sure your Velcro lines match up with the Velcro on the pockets you make next.

How to make the Velcro pockets.
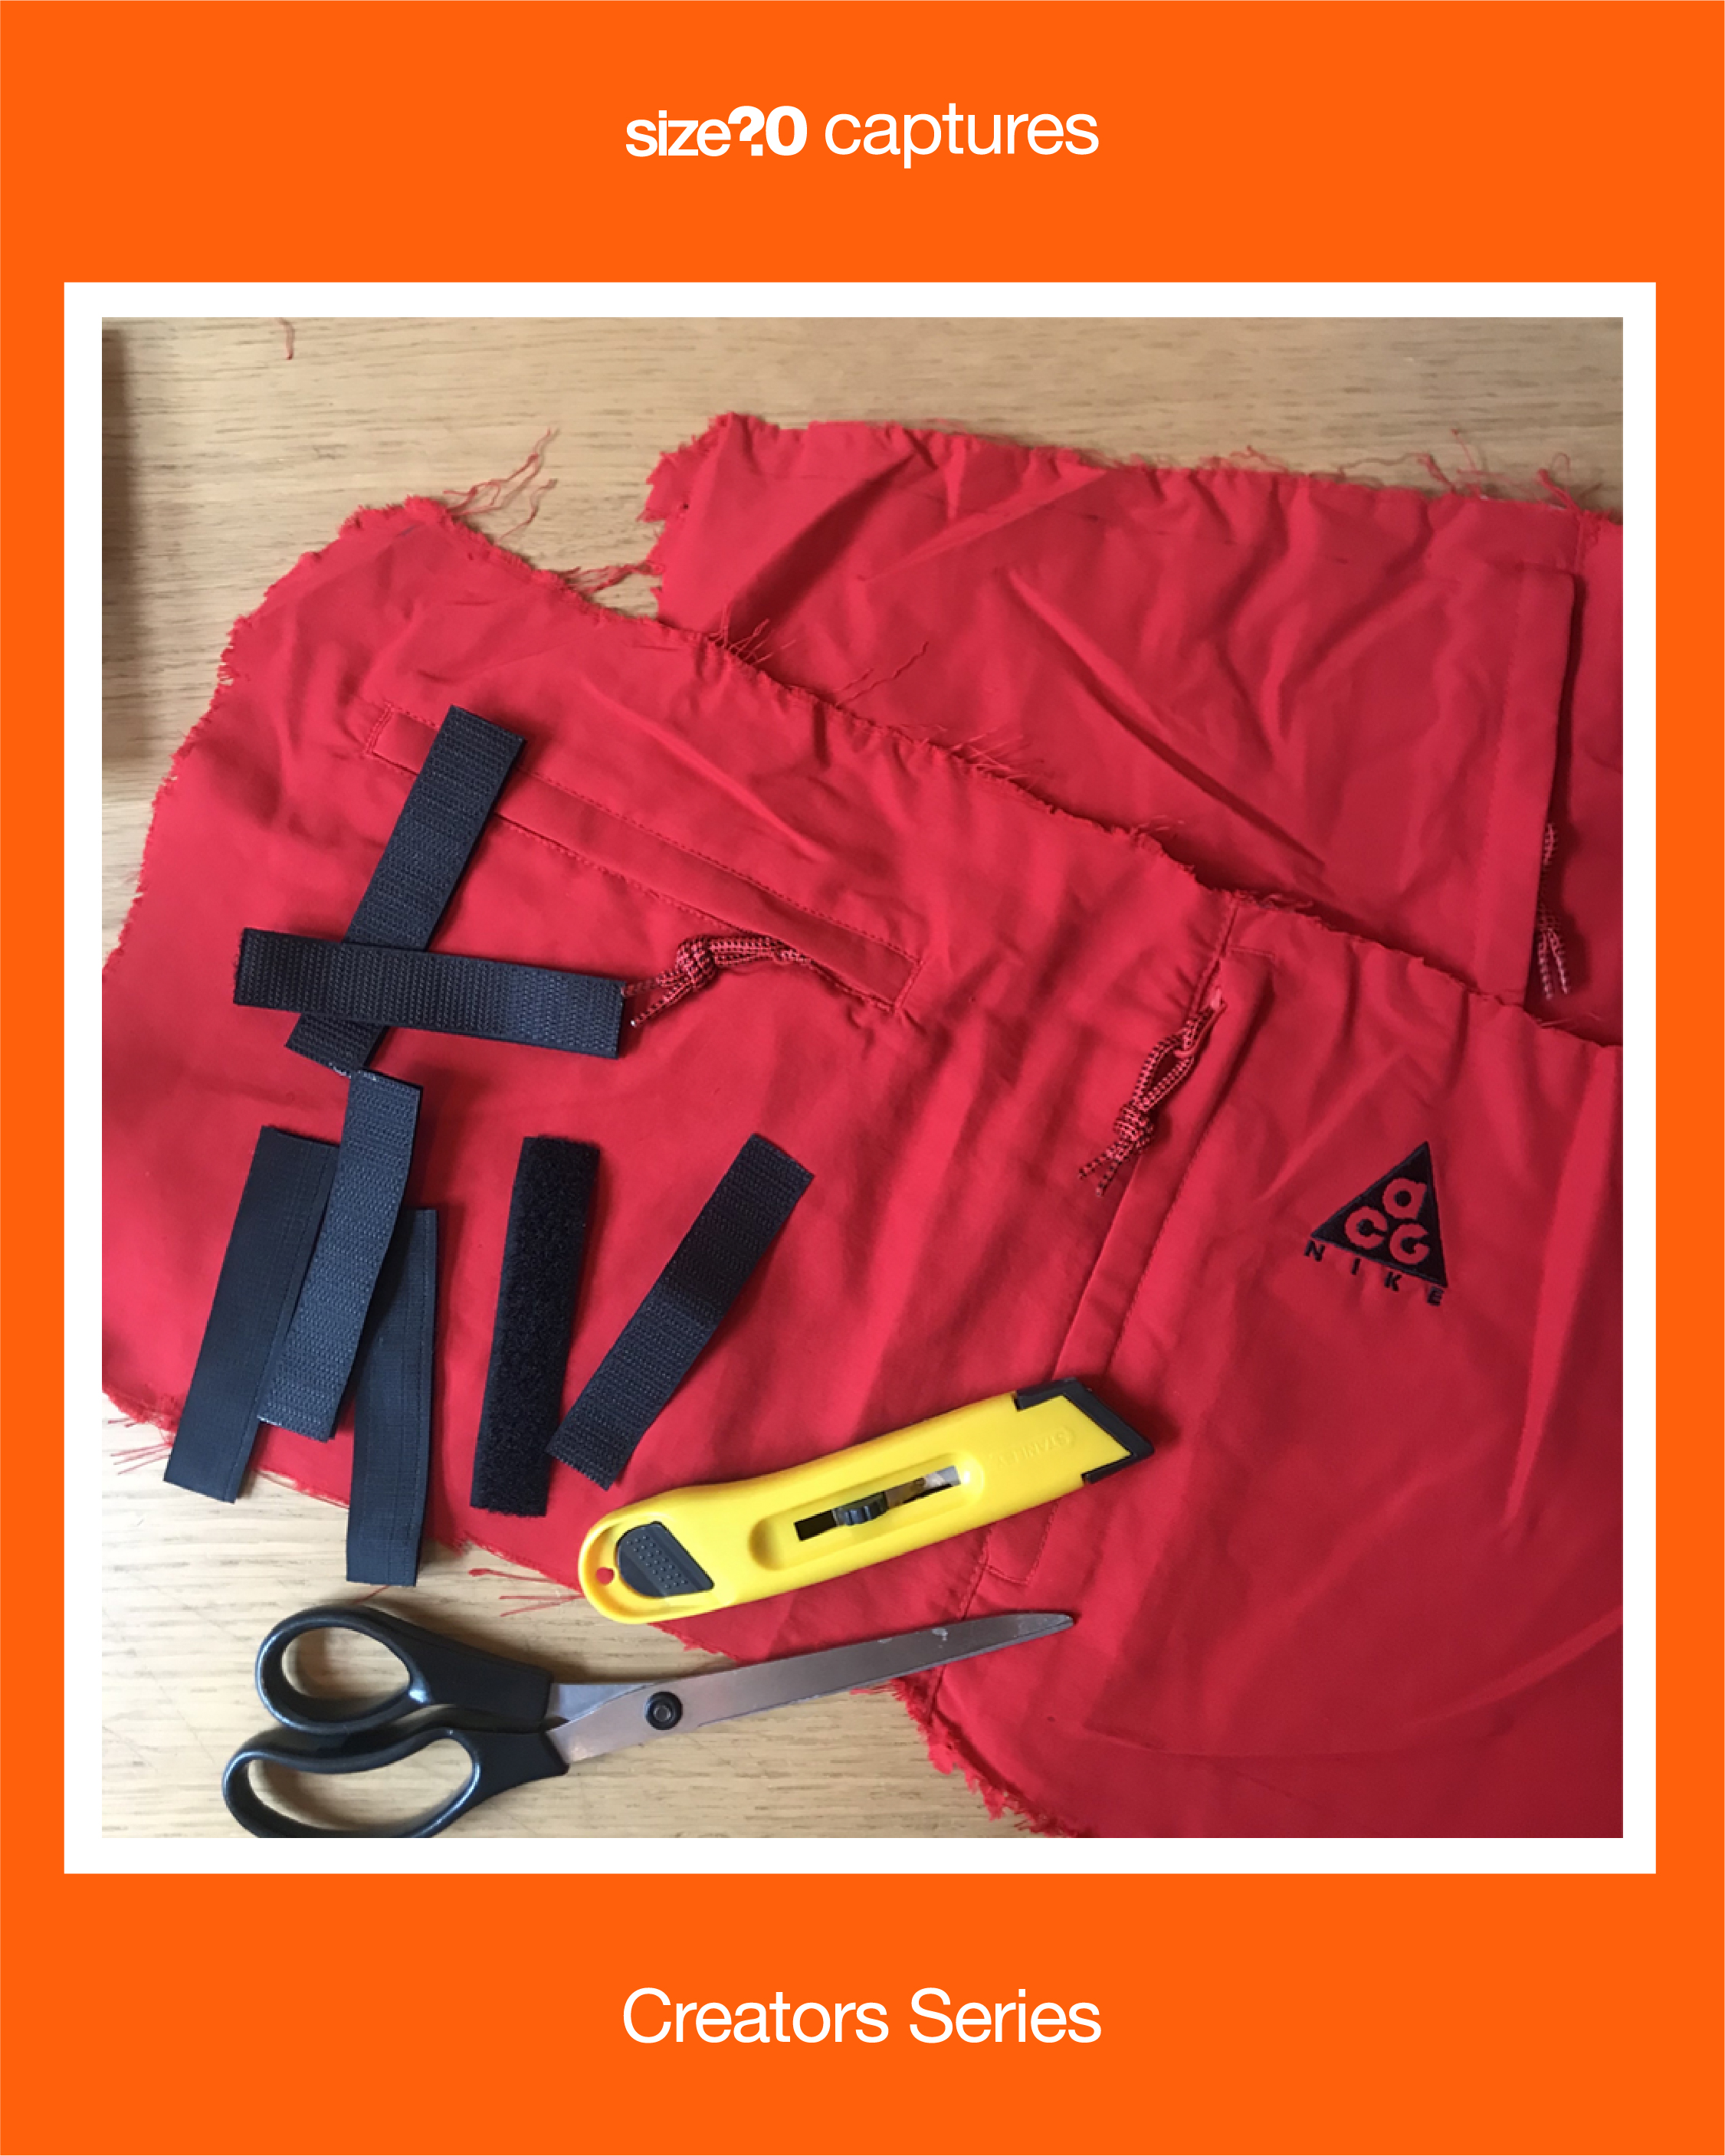
Now take the pair of shorts (or whatever you want to upcycle) and deconstruct to create various small pockets to any size you want with the amount of fabric you have.
Finn cut squares utilising the already existing pockets on the shorts but you can easily make your own pockets with this how-to guide.
Step 1: Determine the size and shape of the pocket you would like and draw it on a piece of paper. The easiest way to make it symmetrical is to fold a piece of paper in half and draw one side of the pocket.
Step 2: Add a seam allowance around the shape of your pocket. Finn likes to add 1/4 inch (6mm) seam allowances to pockets. Cut around your seam allowance line and you’ve now got yourself a pattern.
Step 3: Take your pattern piece and place on the wrong side of your fabric. Draw around your pattern using chalk or a removable pen. Then repeat. This helps you to stitch really accurately and get a neat and even shape at the end.
Step 4: With right sides together, stitch the pocket pieces all the way around leaving a 1 1/2 to 2 inch ( 3.8-5cm) gap at the side or bottom. Note: the bigger the pocket, the bigger the gap that is needed.
Step 5: Turn your pocket the right way out and iron well. Make sure any curves are poked out and the corners are smooth.
Step 6: Final step. Attach the velcro into place with fabric glue before stitching down – this will make it easier to sew neatly. Then stitch around the sides and bottom with a topstitch that is close to the edge, securing in place.
Excess material? Use it to your advantage and create a matching tote bag
Using the scrap material from your trouser legs and the belt leftover from your shorts, you can make this into a handy ACG branded bag (or whatever you’re deciding to make it out of).

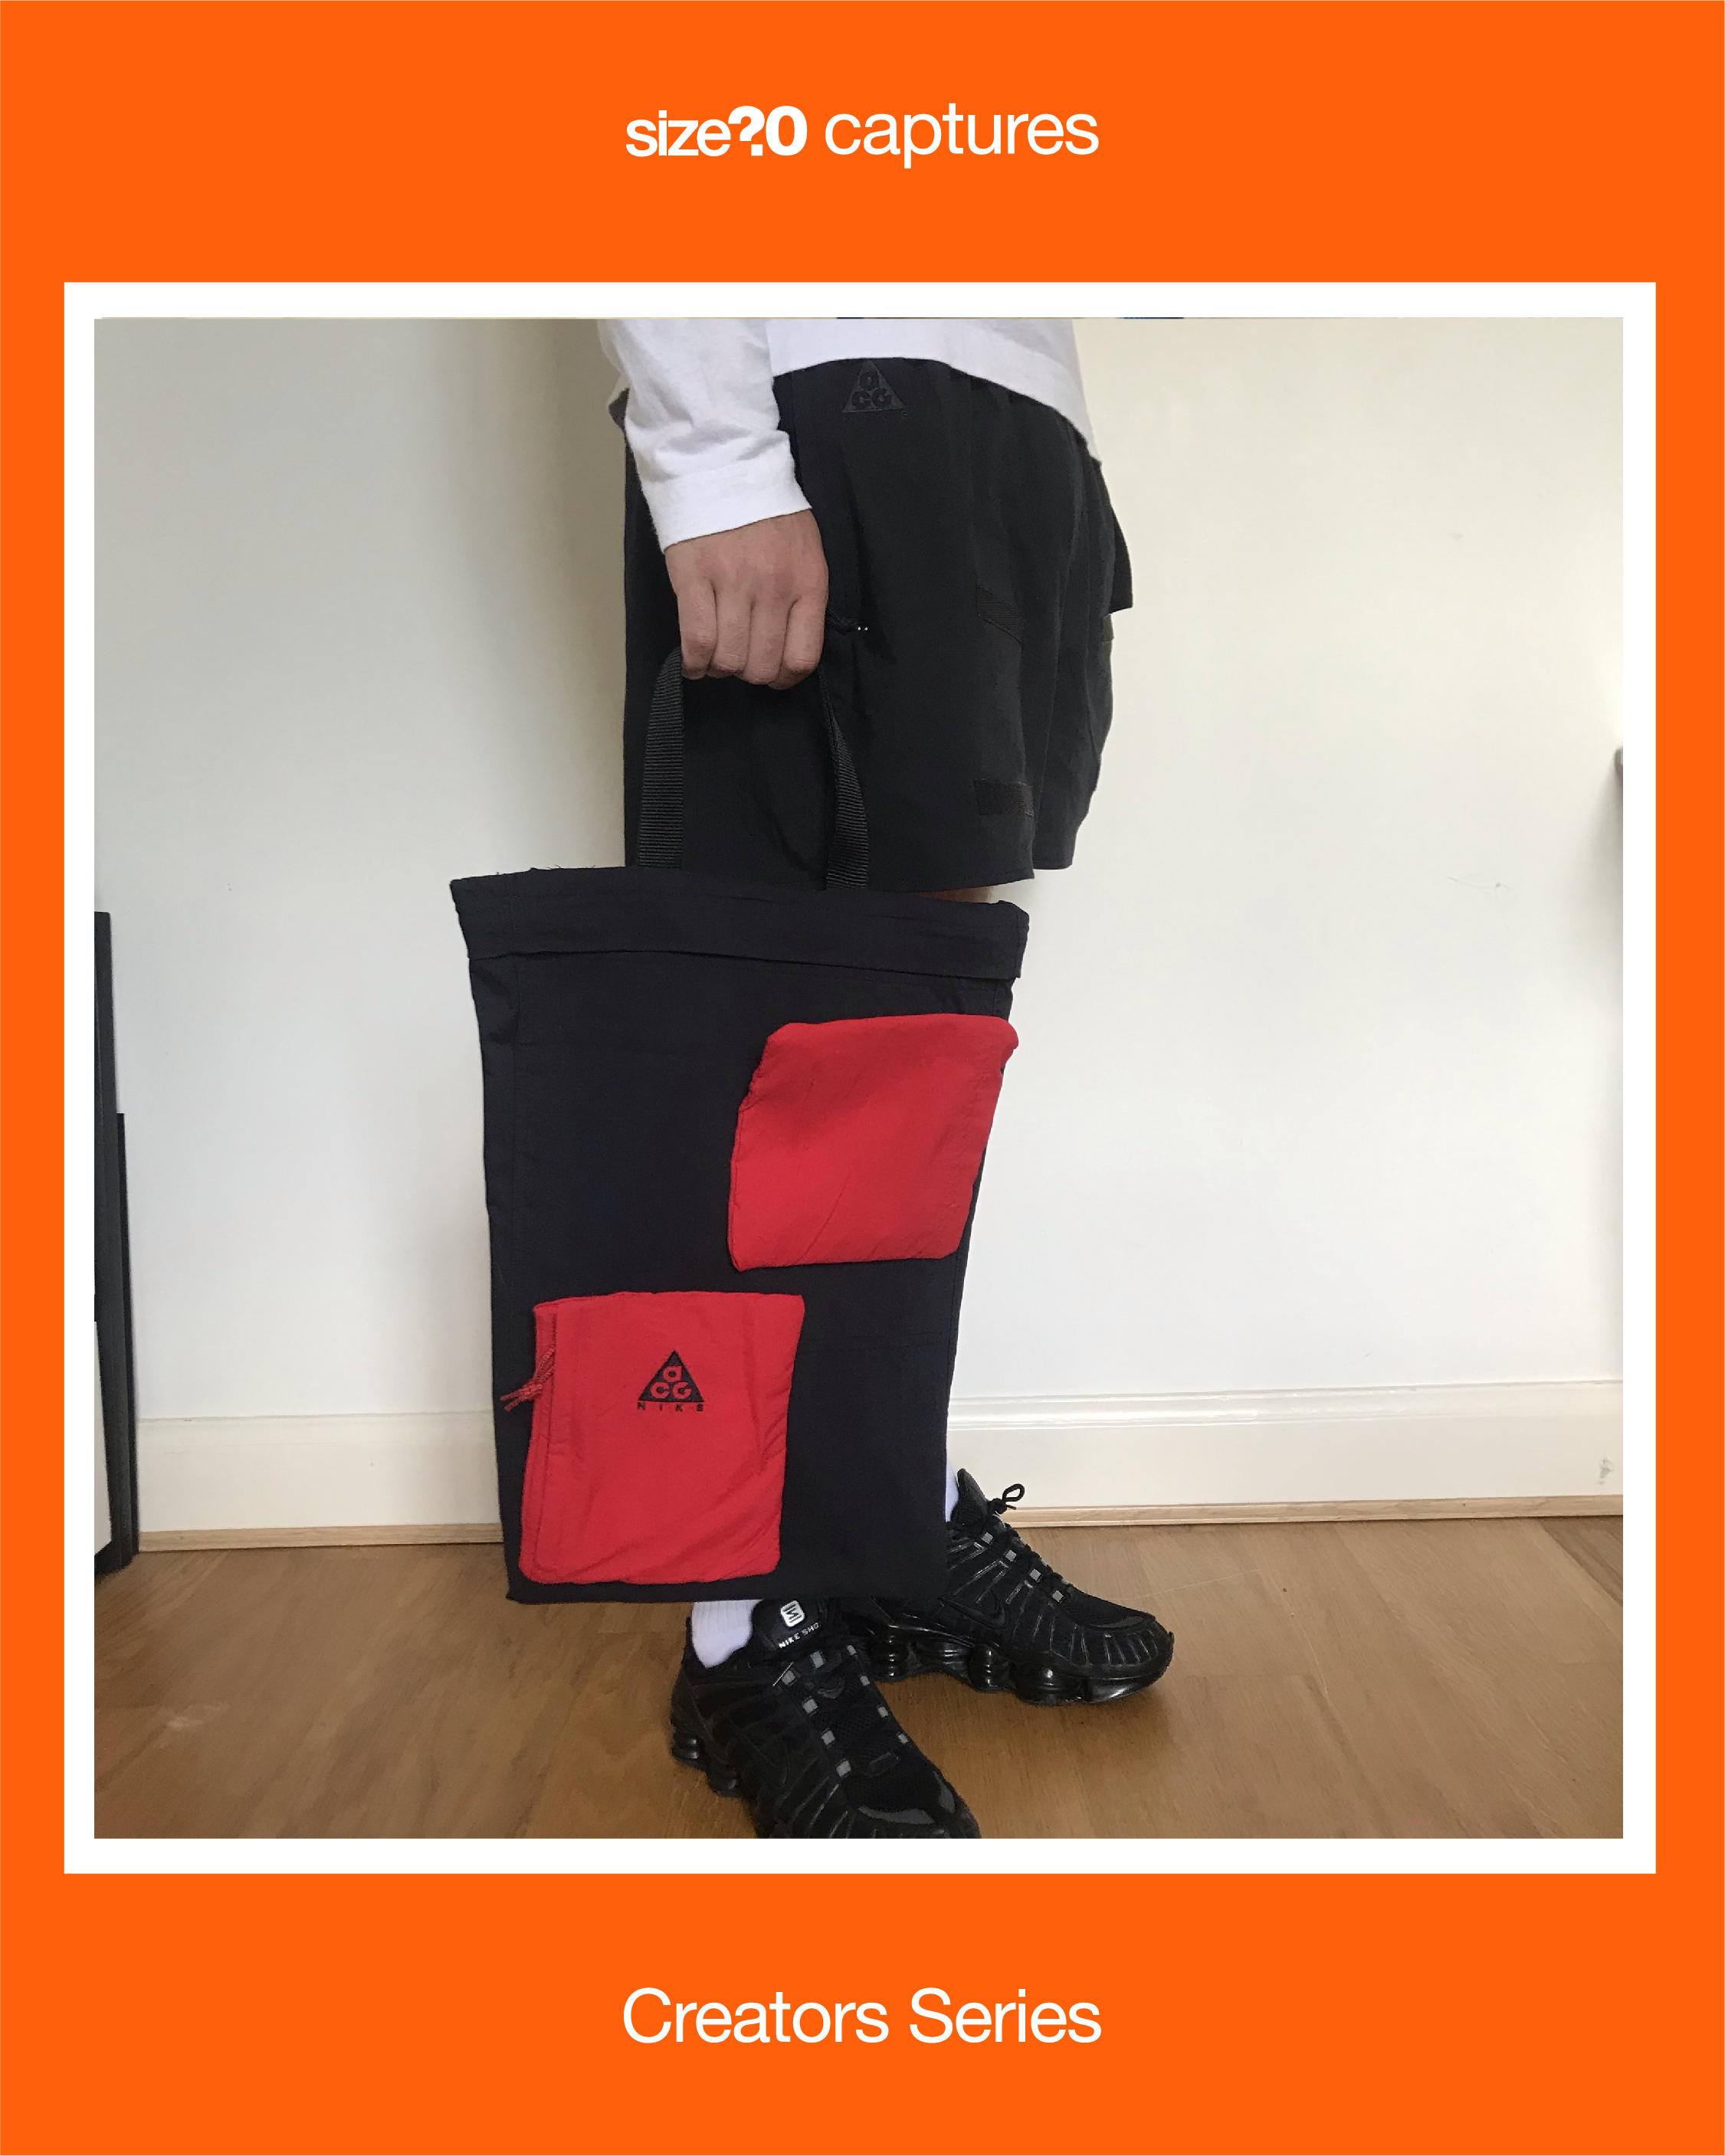
Step 1: Turn your trouser leg inside out and cut to the length of the tote bag you want to make. Don’t forget to add a seam allowance for when you stitch close the bottom of the bag.
Step 2: Iron straight and stitch around the bottom of your trouser leg to close. You’ll now have just a one side open.
Step 3: Now hem the top of your bag using a topstitching technique. When you’re stitching the edge of a bag opening or flap, it can help to use a 1/4 inch (6mm) foot as a guide. Practice first – it’s important to get your tension correct for a professional finish. Use a longer stitch length for best results.
Step 4: Once finished, turn your leg (now bag) the right way out and iron well.
Step 5: Adding the handle. Pin the belt or handle on the inside of your now made bag, either laces or straps from an old bag and stitch these inside when sewing the top closed.
Step 6: Adding the velcro tabs. Attach the reverse side of your velcro into place with fabric glue before stitching down – this will make it easier to sew neatly. Then stitch around the sides and bottom with a topstitch that is close to the edge, securing in place.
Finn then goes on to explain: “Consumers want more personal items that are still commercial. This can easily be done at home, either with an old sewing machine or hand-stitching and has endless options. You could add velcro to a hoodie, joggers, jeans or trainers and create new products from your old or unused clothes.”
Keep checking on the size? blog for more size? captures: Creators Series instalments and head over to the Creators Series Hub for previous editions.
Share This: